This morning I had the opportunity to give a Computer Science Education Week presentation to a third grade class at Liberty Elementary School in Springfield, MA. Since the students already have learned some CS curriculum, I told them about how CS influenced my life and how CS shaped the careers of some of my friends.

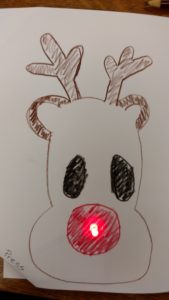
Finished LED holiday card!
After the formalities, we did a fun activity. We made LED Holiday Cards.
Please read on to find out about the cards!

CSE Week Circuit Card
The LED holiday card is an fun project to introduce batteries, LED lights, and circuits while expressing creativity with drawing and design. The project is affordable so each student can take their project home. Each student only requires card stock, batteries, office tape, and LED lights. The copper tape shown above is optional.
Materials:
- Card stock – 90-lb white, 1 sheet per student (Target has it).
- LED lights – 1 light per student minimum (Amazon)
- Batteries – 2032 coin cell, 1 per light (Amazon)
- Coloring utensils – Pencils, crayons, markers
- Office Tape – masking or scotch-style office tape
- OPTIONAL: Copper tape – 1/4″ (Amazon)
I have linked Amazon because it is familiar and easy to order from, but an electronics specialist like Digikey will give much better prices on batteries and LED lights if bought in bulk.
Curriculum:
- Introduce circuits. For the third graders, I talked about electricity and how it could hurt us if we touched the wall plug or lightning, but that we could use it for our own uses if we learned about it to be safe.
- Introduce the LED light and the battery.

LED Light Description & Batteries
Today, I demonstrated how you can directly touch the leads of the LED to the coin cell battery. One side of the battery was the positive side and the other negative, you can read it on the battery. A circuit is how electricity leaves the battery, travels down the metal lead into the bulb, makes light in the LED, and then travels back into the negative side of the battery. If there is not a loop, the electricity cannot flow through the circuit and the light won’t work!

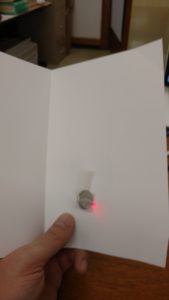
LED light attached to battery.
If you try attaching the LED to the battery and the LED doesn’t light up, turn the LED around so the other lead is touching the positive side.
- Pass out the card stock and coloring materials.
- Invite the students to think about what they would like to draw, what aspect should light up? Show them some examples. If the students would like to make cards, demonstrate how to fold the paper.

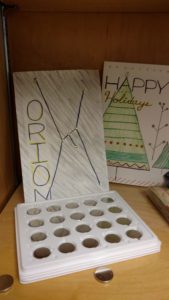
LED Holiday Cards – “Orion Constellation” and “Happy Holiday Tree”
- As students start deciding where the light should go, use the push pin (or a safety pin) to poke to small holes that the LED leads can push through. While you poke the hole, give the student an LED and battery. Ask them to show you that they can make it light up.
- After the student has a working light, have them push it through the holes in the card.

LED pushed through card holes with battery attached.
- When the students have finished with their creations, secure the connection with tape, and enjoy the beautiful result!The lights should work for about a day. If the student wants to bring the device home, have them tape the LED and battery into the card disconnected. This will ensure safe keeping in their bag for re-assembly at home.

Finished LED holiday card!
The above activities took about 50 minutes when I was teaching this alone, but could be sped up with additional helpers.In my examples above I used copper tape to discuss how we could extend the circuit using the tape as a wire. If there is time and interest, continue!
- OPTIONAL: Distribute copper tape, help the students design a circuit, demonstrate how to remove the paper backing from the tape.For the third grade students I drew lines on their cards and asked them to cover the line with copper tape. When the line was covered, I helped the students fold over the edge of the card onto the battery and use conductive tape to secure the LED leads to the tape and card. Most students did not complete this within the hour, so I would not repeat this part of the project with this age group and format.
- Fold-over a corner of the card and draw traces for the LED and battery circuit.

- Student will cover the lines with copper tape. Make sure to overlap the corners

- After the traces are in place, push the LED through the paper and bend over the leads to overlap to the two traces. Place the battery into position. “Troubleshoot” until the LED lights. Look for battery inserted upside down, gaps in the circuit, over lapping traces that shouldn’t, battery touching both traces on one side.

- After testing the light, secure the LED leads to the traces with more copper tape. You can also secure the battery using clear tape (don’t use copper tape here).

- Enjoy and show off your work!

Finished LED holiday card!
Acknowledgements:
Thanks to Professor Audrey St. John for teaching me this project as part of the Mount Holyoke College Makerspace Winter Holiday event of 2015.
